


Game Information
Adelaide Oval
| fourth Quarter | |||
|---|---|---|---|
| Time | Team | Play | Score |
| 27:12 |  | J. Melksham Behind | 37 - 88 |
| 23:26 | | B. Fritsch Goal | 37 - 87 |
| 21:57 | | Rushed | 37 - 81 |
| 19:23 | | J. Viney Goal | 37 - 80 |
| 17:09 | | J. Melksham Goal | 37 - 74 |
| 14:05 | | B. Fritsch Goal | 37 - 68 |
| 13:08 | | Rushed | 37 - 62 |
| 9:22 |  | B. Crocker Goal | 37 - 61 |
| 7:51 | | J. Melksham Goal | 31 - 61 |
| 5:12 | | S. Weideman Goal | 31 - 55 |
| 2:41 | | C. Oliver Goal | 31 - 49 |
| third Quarter | |||
| Time | Team | Play | Score |
| 21:35 | | Rushed | 31 - 43 |
| 20:25 | | C. Petracca Behind | 30 - 43 |
| 18:31 | | D. Fogarty Behind | 30 - 42 |
| 8:06 | | H. Bennell Goal | 29 - 42 |
| 4:20 | | C. Petracca Behind | 29 - 36 |
| 3:00 | | E. Langdon Behind | 29 - 35 |
| second Quarter | |||
| Time | Team | Play | Score |
| 24:20 | | Rushed | 29 - 34 |
| 19:03 | | P. Seedsman Goal | 28 - 34 |
| 12:57 | | E. Himmelberg Goal | 22 - 34 |
| 10:11 | | N. Jones Behind | 16 - 34 |
| 7:18 | | L. Jackson Goal | 16 - 33 |
| 3:59 | | S. Weideman Goal | 16 - 27 |
| 1:32 | | C. Petracca Behind | 16 - 21 |
| first Quarter | |||
| Time | Team | Play | Score |
| 26:18 | | P. Seedsman Goal | 16 - 20 |
| 23:27 | | S. Weideman Goal | 10 - 20 |
| 21:44 | | L. Murphy Behind | 10 - 14 |
| 18:20 | | Rushed | 9 - 14 |
| 16:06 | | J. Viney Goal | 8 - 14 |
| 15:01 | | E. Himmelberg Behind | 8 - 8 |
| 11:54 | | M. Crouch Behind | 7 - 8 |
| 7:56 | | D. Fogarty Goal | 6 - 8 |
| 5:18 | | J. Viney Behind | 0 - 8 |
| 2:50 | | L. Jackson Goal | 0 - 7 |
| 1:15 | | E. Langdon Behind | 0 - 1 |
On the ESPN Footy Podcast, Jake Michaels says Essendon does not deserve an assistance package from the AFL despite how poor they've been in 2026.
Who should you be tipping in Round 19 of the AFL season? Our footy experts have put their heads together to help you out. So open your ESPNfootytips app, take notes, and get ahead of the game!
There are plenty of talking points after Round 18 of the AFL season, including whether Damien Hardwick was out of line in declaring the struggling Suns should switch their focus to season 2027.
Join ESPN's footy team for some of the best AFL analysis and insight on the ESPN Footy Podcast.
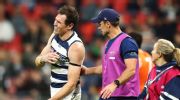
Round 19 of the 2026 AFL season kicks off with a Thursday night cracker between Geelong and St Kilda, as both teams continue to fight for a spot in the top 10.
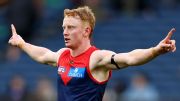
Jake Bowey delivers special message to Jai Arrow after kicking a goal in Melbourne's 46-point win over Richmond.
| POS | Team | Pts. | % | Form |
|---|---|---|---|---|
| 1 |
 FRE FRE
|
60 | 142.3 | WWWLW |
| 2 |
 SYD SYD
|
52 | 131.2 | WWLWL |
| 3 |
 HAW HAW
|
46 | 114.2 | LWWLW |
| 4 |
 BL BL
|
44 | 117.1 | WWWWW |
| 5 |
 ADEL ADEL
|
44 | 116.9 | WWLWW |
| 6 |
 MELB MELB
|
44 | 109.0 | WWLWW |
| 7 |
 WB WB
|
40 | 92.3 | WLWLW |
| 8 |
 COLL COLL
|
38 | 104.4 | LWWWW |
| 9 |
 GEEL GEEL
|
36 | 115.2 | LWLLL |
| 10 |
 STK STK
|
32 | 106.1 | LWLWW |
| 11 |
 GWS GWS
|
32 | 101.6 | LLLWW |
| 12 |
 CARL CARL
|
32 | 91.9 | WWWWL |
| 13 |
 NMFC NMFC
|
32 | 91.4 | WWWLL |
| 14 |
 SUNS SUNS
|
28 | 95.6 | LLLLL |
| 15 |
 PORT PORT
|
24 | 101.3 | LLWWL |
| 16 |
 WCE WCE
|
16 | 72.0 | LLLLL |
| 17 |
 RICH RICH
|
8 | 63.0 | LLLLL |
| 18 |
 ESS ESS
|
4 | 66.6 | LLLLL |