


Game Information
Optus Stadium
| fourth Quarter | |||
|---|---|---|---|
| Time | Team | Play | Score |
| 30:42 |  | J. Bruce Goal | 65 - 93 |
| 27:53 | | M. Hannan Goal | 65 - 87 |
| 26:33 |  | M. Walters Goal | 65 - 81 |
| 24:51 | | M. Crowden Goal | 59 - 81 |
| 23:42 | | R. Lobb Behind | 53 - 81 |
| 21:29 | | M. Hannan Goal | 52 - 81 |
| 19:27 | | A. Naughton Behind | 52 - 75 |
| 16:50 | | A. Naughton Behind | 52 - 74 |
| 15:16 | | R. Lobb Behind | 52 - 73 |
| 13:22 | | T. English Goal | 51 - 73 |
| 11:47 | | M. Bontempelli Behind | 51 - 67 |
| 8:59 | | M. Hannan Behind | 51 - 66 |
| 4:54 | | A. Naughton Behind | 51 - 65 |
| 3:13 | | C. Weightman Goal | 51 - 64 |
| 1:06 | | J. Treacy Behind | 51 - 58 |
| third Quarter | |||
| Time | Team | Play | Score |
| 31:41 | | J. Treacy Goal | 50 - 58 |
| 28:55 | | D. Mundy Behind | 44 - 58 |
| 26:56 | | T. Liberatore Goal | 43 - 58 |
| 22:38 | | T. Liberatore Goal | 43 - 52 |
| 21:24 | | Rushed | 43 - 46 |
| 13:33 | | J. Treacy Goal | 42 - 46 |
| 9:01 | | A. Brayshaw Behind | 36 - 46 |
| 6:49 | | A. Naughton Behind | 35 - 46 |
| 4:54 | | R. Lobb Goal | 35 - 45 |
| 3:07 | | B. Smith Behind | 29 - 45 |
| 1:24 | | M. Walters Behind | 29 - 44 |
| second Quarter | |||
| Time | Team | Play | Score |
| 28:15 | | D. Tucker Behind | 28 - 44 |
| 25:43 | | M. Bontempelli Goal | 27 - 44 |
| 24:17 | | J. Treacy Goal | 27 - 38 |
| 22:30 | | M. Hannan Behind | 21 - 38 |
| 18:58 | | L. Henry Goal | 21 - 37 |
| 16:57 | | M. Bontempelli Goal | 15 - 37 |
| 11:28 | | J. Bruce Behind | 15 - 31 |
| 8:22 | | J. Johannisen Behind | 15 - 30 |
| 6:38 | | A. Naughton Goal | 15 - 29 |
| 4:26 | | J. Johannisen Behind | 15 - 23 |
| 3:23 | | T. Liberatore Behind | 15 - 22 |
| 1:41 | | M. Walters Behind | 15 - 21 |
| first Quarter | |||
| Time | Team | Play | Score |
| 27:57 | | M. Walters Behind | 14 - 21 |
| 24:12 | | C. Weightman Goal | 13 - 21 |
| 19:09 | | A. Brayshaw Goal | 13 - 15 |
| 12:08 | | M. Crowden Behind | 7 - 15 |
| 8:54 | | A. Scott Goal | 6 - 15 |
| 6:48 | | C. Serong Goal | 6 - 9 |
| 5:35 | | L. Hunter Goal | 0 - 9 |
| 4:10 | | A. Naughton Behind | 0 - 3 |
| 1:17 | | Rushed | 0 - 2 |
| 0:14 | | M. Bontempelli Behind | 0 - 1 |
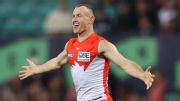
Chad Warner takes flights on the SCG for an impressive mark against the Adelaide Crows
Craig McRae can see a "Collingwood flavour" at Carlton since Josh Fraser became interim coach.
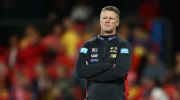
Gold Coast coach Damien Hardwick has apologised to his players for an "overly emotional" reaction when he declared the Suns' season shot.
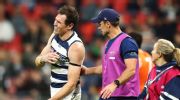
Geelong star Max Holmes is set for an extended stint on the sidelines as he prepares to have surgery on a badly injured ankle.
Round 19 of the 2026 AFL season kicks off with a Thursday night cracker between Geelong and St Kilda, as both teams continue to fight for a spot in the top 10.
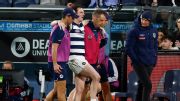
Max Holmes went to ground visibly distressed after having his leg caught in a tackle from Hunter Clark
| POS | Team | Pts. | % | Form |
|---|---|---|---|---|
| 1 |
 FRE FRE
|
60 | 142.3 | WWWLW |
| 2 |
 SYD SYD
|
52 | 128.3 | WLWLL |
| 3 |
 ADEL ADEL
|
48 | 117.2 | WLWWW |
| 4 |
 HAW HAW
|
46 | 114.2 | LWWLW |
| 5 |
 BL BL
|
44 | 117.1 | WWWWW |
| 6 |
 MELB MELB
|
44 | 109.0 | WWLWW |
| 7 |
 GEEL GEEL
|
40 | 116.2 | WLLLW |
| 8 |
 WB WB
|
40 | 92.3 | WLWLW |
| 9 |
 COLL COLL
|
38 | 104.4 | LWWWW |
| 10 |
 STK STK
|
32 | 104.0 | WLWWL |
| 11 |
 GWS GWS
|
32 | 101.6 | LLLWW |
| 12 |
 CARL CARL
|
32 | 91.9 | WWWWL |
| 13 |
 NMFC NMFC
|
32 | 91.4 | WWWLL |
| 14 |
 SUNS SUNS
|
28 | 95.6 | LLLLL |
| 15 |
 PORT PORT
|
24 | 101.3 | LLWWL |
| 16 |
 WCE WCE
|
16 | 72.0 | LLLLL |
| 17 |
 RICH RICH
|
8 | 63.0 | LLLLL |
| 18 |
 ESS ESS
|
4 | 66.6 | LLLLL |