


Game Information
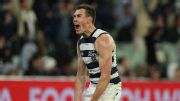
GMHBA Stadium
| fourth Quarter | |||
|---|---|---|---|
| Time | Team | Play | Score |
| 30:46 |  | Rushed | 144 - 32 |
| 28:13 | | T. Hawkins Goal | 143 - 32 |
| 24:58 |  | P. Spicer Behind | 137 - 32 |
| 22:11 | | C. Guthrie Goal | 137 - 31 |
| 19:12 | | J. Cameron Goal | 131 - 31 |
| 18:10 | | Rushed | 125 - 31 |
| 16:21 | | T. Hawkins Behind | 124 - 31 |
| 14:09 | | C. Guthrie Behind | 123 - 31 |
| 9:43 | | J. Cameron Goal | 122 - 31 |
| 8:10 | | Z. Tuohy Behind | 116 - 31 |
| 5:54 | | T. Stengle Goal | 115 - 31 |
| 3:24 | | J. Cameron Behind | 109 - 31 |
| 0:50 | | S. Menegola Goal | 108 - 31 |
| third Quarter | |||
| Time | Team | Play | Score |
| 28:25 | | Q. Narkle Goal | 102 - 31 |
| 25:45 | | B. Close Goal | 96 - 31 |
| 22:53 | | J. Cameron Behind | 90 - 31 |
| 21:00 | | T. Hawkins Goal | 89 - 31 |
| 18:38 | | J. Cameron Behind | 83 - 31 |
| 16:52 | | J. Cameron Goal | 82 - 31 |
| 14:20 | | Z. Guthrie Goal | 76 - 31 |
| 13:32 | | S. Menegola Behind | 70 - 31 |
| 9:12 | | T. Hawkins Goal | 69 - 31 |
| 6:43 | | J. Mahony Goal | 63 - 31 |
| 4:16 | | Rushed | 63 - 25 |
| 0:50 | | T. Hawkins Goal | 62 - 25 |
| second Quarter | |||
| Time | Team | Play | Score |
| 23:48 | | T. Hawkins Goal | 56 - 25 |
| 21:40 | | Q. Narkle Behind | 50 - 25 |
| 20:14 | | G. Miers Behind | 49 - 25 |
| 16:38 | | J. Cameron Goal | 48 - 25 |
| 12:33 | | Q. Narkle Goal | 42 - 25 |
| 10:05 | | T. Xerri Goal | 36 - 25 |
| 7:10 | | T. Hawkins Goal | 36 - 19 |
| 3:09 | | T. Hawkins Behind | 30 - 19 |
| 1:12 | | T. Stengle Goal | 29 - 19 |
| first Quarter | |||
| Time | Team | Play | Score |
| 31:21 | | C. Zurhaar Goal | 23 - 19 |
| 29:19 | | N. Larkey Goal | 23 - 13 |
| 27:52 | | P. Spicer Behind | 23 - 7 |
| 26:25 | | Rushed | 23 - 6 |
| 23:54 | | P. Curtis Goal | 22 - 6 |
| 18:10 | | T. Hawkins Behind | 22 - 0 |
| 14:24 | | M. Holmes Behind | 21 - 0 |
| 10:35 | | B. Close Goal | 20 - 0 |
| 8:33 | | Rushed | 14 - 0 |
| 5:20 | | M. Blicavs Goal | 13 - 0 |
| 4:20 | | Rushed | 7 - 0 |
| 0:15 | | P. Dangerfield Goal | 6 - 0 |
The Coleman Medal is awarded to the player who kicks the most goals throughout the AFL home and away season. Who is on track to win the award in 2026?
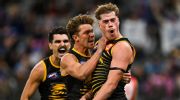
Essendon's injury curse has continued in the post-Brad Scott era, with Archie May dislocating his shoulder in the Bombers' 30-point loss to West Coast at a windy Optus Stadium.
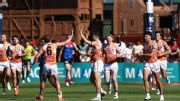
Clayton Oliver shone against his former team and GWS racked up successive wins for the first time this AFL season, continuing Melbourne's barren Alice Springs run.
Kysaiah Pickett ignites the crowd in Alice Springs with a sensational goal for Melbourne.
Michael Sellwood was the unlikely hero with a match-saving mark in defence as the Western Bulldogs boosted their AFL finals hopes with a tense four-point win over Collingwood.
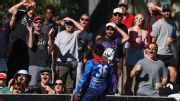
Jye Amiss throws a boot in the air on the goal line to extend Fremantle's lead.
| POS | Team | Pts. | % | Form |
|---|---|---|---|---|
| 1 |
 FRE FRE
|
44 | 135.2 | WWWWW |
| 2 |
 SYD SYD
|
40 | 152.4 | WWWLW |
| 3 |
 HAW HAW
|
34 | 114.8 | DLLWW |
| 4 |
 GEEL GEEL
|
32 | 121.9 | WWWWL |
| 5 |
 SUNS SUNS
|
28 | 116.9 | LWWWL |
| 6 |
 MELB MELB
|
28 | 101.8 | LWWLL |
| 7 |
 WB WB
|
28 | 93.7 | LWLWW |
| 8 |
 ADEL ADEL
|
24 | 107.9 | LWWWL |
| 9 |
 BL BL
|
24 | 103.9 | WWLLL |
| 10 |
 GWS GWS
|
24 | 103.2 | LWLWW |
| 11 |
 COLL COLL
|
22 | 99.9 | DLLWL |
| 12 |
 STK STK
|
20 | 102.3 | WLWLL |
| 13 |
 NMFC NMFC
|
20 | 97.6 | LLLLW |
| 14 |
 CARL CARL
|
16 | 87.5 | LLWWW |
| 15 |
 WCE WCE
|
16 | 70.0 | LLWLW |
| 16 |
 PORT PORT
|
12 | 100.9 | WLLLL |
| 17 |
 RICH RICH
|
8 | 60.4 | WLLWL |
| 18 |
 ESS ESS
|
4 | 70.5 | LLLLL |