


Game Information
Adelaide Oval
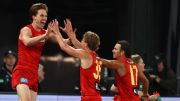
| fourth Quarter | |||
|---|---|---|---|
| Time | Team | Play | Score |
| 30:06 |  | W. Rioli Behind | 94 - 63 |
| 28:43 | | C. Rozee Goal | 93 - 63 |
| 26:20 | | W. Rioli Goal | 87 - 63 |
| 23:10 | | X. Duursma Goal | 81 - 63 |
| 18:16 |  | D. Martin Goal | 75 - 63 |
| 16:50 | | F. Evans Goal | 75 - 57 |
| 14:43 | | S. Powell-Pepper Goal | 69 - 57 |
| 10:26 | | J. Horne-Francis Behind | 63 - 57 |
| 8:01 | | S. Banks Behind | 62 - 57 |
| 5:36 | | Rushed | 62 - 56 |
| 1:19 | | Rushed | 61 - 56 |
| third Quarter | |||
| Time | Team | Play | Score |
| 25:25 | | X. Duursma Behind | 61 - 55 |
| 23:12 | | J. Horne-Francis Behind | 60 - 55 |
| 21:28 | | C. Rozee Behind | 59 - 55 |
| 19:21 | | F. Evans Goal | 58 - 55 |
| 18:06 | | S. Banks Goal | 52 - 55 |
| 15:37 | | D. Byrne-Jones Behind | 52 - 49 |
| 11:14 | | J. Short Behind | 51 - 49 |
| 10:13 | | Rushed | 51 - 48 |
| 9:04 | | W. Rioli Behind | 50 - 48 |
| 4:54 | | D. Rioli Goal | 49 - 48 |
| 3:53 | | T. Nankervis Behind | 49 - 42 |
| 1:11 | | D. Byrne-Jones Goal | 49 - 41 |
| second Quarter | |||
| Time | Team | Play | Score |
| 30:07 | | D. Martin Behind | 43 - 41 |
| 29:30 | | Rushed | 43 - 40 |
| 28:47 | | J. Finlayson Behind | 42 - 40 |
| 25:52 | | I. Soldo Goal | 41 - 40 |
| 22:23 | | S. Bolton Behind | 41 - 34 |
| 21:10 | | T. Taranto Behind | 41 - 33 |
| 19:02 | | F. Evans Goal | 41 - 32 |
| 17:09 | | N. Balta Behind | 35 - 32 |
| 14:31 | | Rushed | 35 - 31 |
| 12:27 | | J. Graham Behind | 34 - 31 |
| 10:01 | | S. Bolton Behind | 34 - 30 |
| 7:26 | | D. Houston Goal | 34 - 29 |
| 5:38 | | C. Rozee Behind | 28 - 29 |
| 2:50 | | J. Bauer Goal | 27 - 29 |
| 1:55 | | T. Taranto Behind | 27 - 23 |
| first Quarter | |||
| Time | Team | Play | Score |
| 34:36 | | S. Powell-Pepper Behind | 27 - 22 |
| 32:43 | | O. Lord Goal | 26 - 22 |
| 29:53 | | S. Bolton Goal | 20 - 22 |
| 27:12 | | W. Rioli Goal | 20 - 16 |
| 22:27 | | W. Rioli Behind | 14 - 16 |
| 18:47 | | O. Lord Goal | 13 - 16 |
| 15:07 | | J. Graham Goal | 7 - 16 |
| 13:05 | | S. Banks Behind | 7 - 10 |
| 9:25 | | N. Balta Behind | 7 - 9 |
| 7:57 | | S. Powell-Pepper Goal | 7 - 8 |
| 5:18 | | D. Houston Behind | 1 - 8 |
| 2:20 | | S. Bolton Goal | 0 - 8 |
| 1:49 | | Rushed | 0 - 2 |
| 1:11 | | S. Bolton Behind | 0 - 1 |
The Western Bulldogs scored quickly from stoppage with a clean clearance from Marcus Bontempelli ending in a goal to Cody Weightman.
Chad Warner kicks a wonderful goal on his left foot after breaking away from a forward stoppage.
Nick Watson kicks Hawthorn's fifth goal in a row against Essendon.
A frustrated Harley Reid looks to be copping a raw deal on the umpiring front, and West Coast will consider approaching the AFL over the lack of apparent protection afforded to their star midfielder.
Ben Ainsworth snaps through an important goal after taking a contested grab.
The Suns skipper weaves his way through heavy traffic on his way to a goal of the week contender.
| POS | Team | Pts. | % | Form |
|---|---|---|---|---|
| 1 |
 FRE FRE
|
68 | 146.0 | WLWWW |
| 2 |
 SYD SYD
|
56 | 130.0 | LWLLW |
| 3 |
 HAW HAW
|
54 | 124.0 | WLWWW |
| 4 |
 BL BL
|
48 | 117.8 | WWWWW |
| 5 |
 ADEL ADEL
|
48 | 113.7 | LWWWL |
| 6 |
 MELB MELB
|
48 | 107.8 | LWWWL |
| 7 |
 WB WB
|
48 | 96.8 | WLWWW |
| 8 |
 COLL COLL
|
46 | 107.6 | WWWWW |
| 9 |
 GEEL GEEL
|
44 | 116.5 | LLLWW |
| 10 |
 CARL CARL
|
36 | 92.4 | WWLLW |
| 11 |
 STK STK
|
32 | 104.0 | WLWWL |
| 12 |
 GWS GWS
|
32 | 98.3 | LWWLL |
| 13 |
 NMFC NMFC
|
32 | 90.9 | WWLLL |
| 14 |
 SUNS SUNS
|
28 | 94.8 | LLLLL |
| 15 |
 PORT PORT
|
24 | 99.3 | LWWLL |
| 16 |
 WCE WCE
|
16 | 70.1 | LLLLL |
| 17 |
 ESS ESS
|
8 | 65.4 | LLLWL |
| 18 |
 RICH RICH
|
8 | 60.9 | LLLLL |