Game Information
Adelaide Oval
| fourth Quarter | |||
|---|---|---|---|
| Time | Team | Play | Score |
| 31:11 |  | Rushed | 77 - 96 |
| 29:56 | | I. Rankine Goal | 76 - 96 |
| 28:05 |  | B. Close Goal | 70 - 96 |
| 26:54 | | G. Miers Goal | 70 - 90 |
| 20:42 | | T. Walker Behind | 70 - 84 |
| 19:19 | | D. Fogarty Behind | 69 - 84 |
| 17:57 | | R. O'Brien Goal | 68 - 84 |
| 16:16 | | Rushed | 62 - 84 |
| 12:51 | | T. Stengle Behind | 61 - 84 |
| 12:22 | | Rushed | 61 - 83 |
| 9:03 | | J. Cameron Behind | 61 - 82 |
| 7:15 | | S. Mannagh Behind | 61 - 81 |
| 5:09 | | T. Walker Goal | 61 - 80 |
| 3:14 | | J. Cameron Behind | 55 - 80 |
| third Quarter | |||
| Time | Team | Play | Score |
| 31:33 | | P. Dangerfield Behind | 55 - 79 |
| 27:16 | | D. Fogarty Behind | 55 - 78 |
| 24:51 | | T. Hawkins Goal | 54 - 78 |
| 23:43 | | O. Henry Goal | 54 - 72 |
| 18:02 | | S. Mannagh Behind | 54 - 66 |
| 14:21 | | T. Hawkins Goal | 54 - 65 |
| 12:37 | | T. Hawkins Goal | 54 - 59 |
| 9:47 | | I. Rankine Goal | 54 - 53 |
| 8:56 | | Rushed | 48 - 53 |
| 5:06 | | J. Cameron Goal | 47 - 53 |
| 2:18 | | T. Walker Goal | 47 - 47 |
| 0:27 | | D. Fogarty Goal | 41 - 47 |
| second Quarter | |||
| Time | Team | Play | Score |
| 24:07 | | T. Walker Behind | 35 - 47 |
| 21:45 | | C. Burgess Behind | 34 - 47 |
| 19:52 | | L. Pedlar Behind | 33 - 47 |
| 12:41 | | Rushed | 32 - 47 |
| 10:43 | | O. Henry Goal | 32 - 46 |
| 8:16 | | C. Burgess Goal | 32 - 40 |
| 5:14 | | Rushed | 26 - 40 |
| 3:02 | | D. Fogarty Goal | 26 - 39 |
| first Quarter | |||
| Time | Team | Play | Score |
| 36:43 | | J. Rachele Goal | 20 - 39 |
| 35:48 | | Rushed | 14 - 39 |
| 33:05 | | J. Cameron Goal | 13 - 39 |
| 31:24 | | T. Hawkins Goal | 13 - 33 |
| 30:01 | | Rushed | 13 - 27 |
| 27:51 | | Rushed | 12 - 27 |
| 26:06 | | Rushed | 12 - 26 |
| 24:26 | | C. Burgess Goal | 12 - 25 |
| 23:59 | | Rushed | 6 - 25 |
| 18:41 | | G. Miers Goal | 6 - 24 |
| 16:24 | | S. Mannagh Goal | 6 - 18 |
| 8:22 | | T. Stengle Goal | 6 - 12 |
| 4:07 | | G. Miers Goal | 6 - 6 |
| 3:01 | | J. Soligo Goal | 6 - 0 |
Round 20 of the 2026 AFL season kicks off with a Thursday night blockbuster between Adelaide and Collingwood, before another Friday night double header.
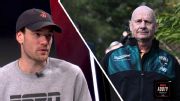
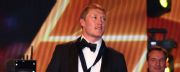
After Ken Hinkley was announced as the inaugural Tasmania Devils coach, the ESPN Footy Podcast discuss if he is the right man for the job.
Join ESPN's footy team for some of the best AFL analysis and insight on the ESPN Footy Podcast.
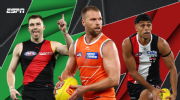
Jake Stringer had one of the all-time stinkers in front of goal, and a young star needs to learn to beat the tag. Plus, how good is winning, Bombers fans?! Here's whose stocks are up and down after Round 19.
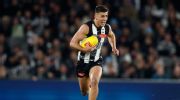
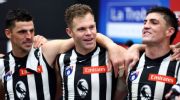
If you're another club with genuine flag aspirations, Collingwood won't be appearing anywhere on your September wish list.
The Brownlow Medal is the highest individual honour in the AFL. In 2026, ESPN is giving you an advantage with our one-of-a-kind predictor.
| POS | Team | Pts. | % | Form |
|---|---|---|---|---|
| 1 |
 FRE FRE
|
64 | 142.0 | WWLWW |
| 2 |
 SYD SYD
|
52 | 128.3 | WLWLL |
| 3 |
 HAW HAW
|
50 | 118.4 | WWLWW |
| 4 |
 BL BL
|
48 | 117.8 | WWWWW |
| 5 |
 ADEL ADEL
|
48 | 117.2 | WLWWW |
| 6 |
 MELB MELB
|
48 | 109.6 | WLWWW |
| 7 |
 WB WB
|
44 | 93.2 | LWLWW |
| 8 |
 COLL COLL
|
42 | 105.6 | WWWWW |
| 9 |
 GEEL GEEL
|
40 | 116.2 | WLLLW |
| 10 |
 STK STK
|
32 | 104.0 | WLWWL |
| 11 |
 GWS GWS
|
32 | 101.3 | LLWWL |
| 12 |
 CARL CARL
|
32 | 91.1 | WWWLL |
| 13 |
 NMFC NMFC
|
32 | 90.9 | WWLLL |
| 14 |
 SUNS SUNS
|
28 | 95.3 | LLLLL |
| 15 |
 PORT PORT
|
24 | 99.3 | LWWLL |
| 16 |
 WCE WCE
|
16 | 72.1 | LLLLL |
| 17 |
 ESS ESS
|
8 | 67.9 | LLLLW |
| 18 |
 RICH RICH
|
8 | 61.7 | LLLLL |