


Game Information
Marvel Stadium
| fourth Quarter | |||
|---|---|---|---|
| Time | Team | Play | Score |
| 26:54 |  | J. Williams Goal | 113 - 41 |
| 24:23 |  | C. Sharman Goal | 113 - 35 |
| 17:21 | | M. Wood Goal | 107 - 35 |
| 13:01 | | Rushed | 101 - 35 |
| 9:36 | | T. Membrey Goal | 100 - 35 |
| 7:56 | | T. Membrey Goal | 94 - 35 |
| 6:05 | | J. Battle Goal | 88 - 35 |
| 5:02 | | C. Sharman Behind | 82 - 35 |
| 3:25 | | T. Membrey Goal | 81 - 35 |
| 0:32 | | D. Butler Goal | 75 - 35 |
| third Quarter | |||
| Time | Team | Play | Score |
| 26:04 | | Rushed | 69 - 35 |
| 19:43 | | M. Wood Goal | 68 - 35 |
| 17:12 | | M. Wood Behind | 62 - 35 |
| 13:32 | | J. Williams Goal | 61 - 35 |
| 10:49 | | T. Membrey Goal | 61 - 29 |
| 9:37 | | M. Wood Behind | 55 - 29 |
| 7:05 | | J. Steele Goal | 54 - 29 |
| 5:04 | | M. Wood Behind | 48 - 29 |
| 0:59 | | L. Ryan Behind | 47 - 29 |
| second Quarter | |||
| Time | Team | Play | Score |
| 27:06 | | D. Butler Goal | 47 - 28 |
| 23:38 | | H. Clark Behind | 41 - 28 |
| 20:48 | | T. Membrey Goal | 40 - 28 |
| 18:00 | | J. Williams Goal | 34 - 28 |
| 16:35 | | L. Ryan Behind | 34 - 22 |
| 15:37 | | L. Ryan Behind | 34 - 21 |
| 13:52 | | J. Hutchinson Behind | 34 - 20 |
| 12:10 | | M. Wood Behind | 34 - 19 |
| 9:41 | | Bailey J. Williams Behind | 33 - 19 |
| 6:57 | | M. Wood Goal | 33 - 18 |
| 3:21 | | O. Allen Goal | 27 - 18 |
| 1:20 | | C. Sharman Goal | 27 - 12 |
| first Quarter | |||
| Time | Team | Play | Score |
| 21:08 | | O. Allen Goal | 21 - 12 |
| 17:52 | | R. Maric Goal | 21 - 6 |
| 15:30 | | M. Owens Goal | 21 - 0 |
| 12:13 | | D. Wilson Goal | 15 - 0 |
| 8:29 | | Rushed | 9 - 0 |
| 4:33 | | J. Higgins Goal | 8 - 0 |
| 3:00 | | M. Owens Behind | 2 - 0 |
| 0:33 | | R. Marshall Behind | 1 - 0 |
Join ESPN's footy team for some of the best AFL analysis and insight on the ESPN Footy Podcast.
Adelaide great Tony Modra has avoided serious brain injury after a life-threatening truck accident, says fellow club icon Mark Ricciuto.
Round 16 of the 2026 AFL season kicks off with a Thursday night blockbuster between Brisbane and Sydney at the Gabba. Then, on Friday evening, Hawthorn and GWS clash at the MCG.
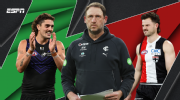
The Josh Fraser hype train keeps gaining momentum at Carlton, and Luke Jackson looks almost unstoppable. But should the Saints be worried about their finals chances? Here's whose stocks are up and down after Round 15.
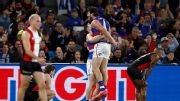
Marcus Bontempelli cleanly gathers a low ball and snaps home a beauty in one seamless motion.
The Coleman Medal is awarded to the player who kicks the most goals throughout the AFL home and away season. Who is on track to win the award in 2026?
| POS | Team | Pts. | % | Form |
|---|---|---|---|---|
| 1 |
 FRE FRE
|
52 | 144.4 | WWWWW |
| 2 |
 SYD SYD
|
48 | 143.7 | WLWWW |
| 3 |
 HAW HAW
|
38 | 113.5 | LWWLW |
| 4 |
 GEEL GEEL
|
36 | 120.6 | WLLWL |
| 5 |
 ADEL ADEL
|
36 | 113.2 | WLWWW |
| 6 |
 MELB MELB
|
36 | 104.2 | LLWWL |
| 7 |
 WB WB
|
36 | 92.8 | WWWLW |
| 8 |
 BL BL
|
32 | 108.4 | LLLWW |
| 9 |
 SUNS SUNS
|
28 | 105.3 | WLLLL |
| 10 |
 NMFC NMFC
|
28 | 90.7 | LWLWW |
| 11 |
 COLL COLL
|
26 | 101.5 | LWLLW |
| 12 |
 STK STK
|
24 | 100.6 | LLLWL |
| 13 |
 GWS GWS
|
24 | 100.3 | LWWLL |
| 14 |
 CARL CARL
|
24 | 91.1 | WWWWW |
| 15 |
 PORT PORT
|
16 | 98.7 | LLWLL |
| 16 |
 WCE WCE
|
16 | 72.7 | WLWLL |
| 17 |
 RICH RICH
|
8 | 61.3 | LWLLL |
| 18 |
 ESS ESS
|
4 | 70.4 | LLLLL |