


Game Information
Adelaide Oval
| fourth Quarter | |||
|---|---|---|---|
| Time | Team | Play | Score |
| 28:33 |  | S. Darcy Goal | 111 - 72 |
| 27:48 |  | Rushed | 111 - 66 |
| 25:28 | | T. English Goal | 110 - 66 |
| 22:15 | | D. Curtin Goal | 110 - 60 |
| 21:07 | | Rushed | 104 - 60 |
| 18:30 | | L. McNeil Goal | 104 - 59 |
| 14:55 | | Rushed | 104 - 53 |
| 11:43 | | D. Curtin Goal | 104 - 52 |
| 10:23 | | D. Fogarty Goal | 98 - 52 |
| 8:13 | | L. Murphy Behind | 92 - 52 |
| 6:26 | | C. Weightman Behind | 91 - 52 |
| 2:47 | | S. Darcy Behind | 91 - 51 |
| third Quarter | |||
| Time | Team | Play | Score |
| 30:19 | | R. Thilthorpe Goal | 91 - 50 |
| 28:37 | | J. Rachele Goal | 85 - 50 |
| 27:10 | | Rushed | 79 - 50 |
| 25:48 | | S. Darcy Behind | 79 - 49 |
| 15:01 | | E. Richards Goal | 79 - 48 |
| 13:06 | | I. Rankine Goal | 79 - 42 |
| 11:43 | | D. Fogarty Goal | 73 - 42 |
| 9:50 | | M. Bontempelli Behind | 67 - 42 |
| 6:39 | | D. Fogarty Goal | 67 - 41 |
| 3:20 | | M. Bontempelli Goal | 61 - 41 |
| 1:48 | | Rushed | 61 - 35 |
| 0:47 | | L. Sholl Behind | 61 - 34 |
| second Quarter | |||
| Time | Team | Play | Score |
| 31:42 | | M. Bontempelli Goal | 60 - 34 |
| 30:22 | | R. Garcia Behind | 60 - 28 |
| 26:56 | | D. Fogarty Behind | 60 - 27 |
| 24:19 | | S. Darcy Behind | 59 - 27 |
| 21:37 | | B. Keays Goal | 59 - 26 |
| 20:06 | | J. Dawson Goal | 53 - 26 |
| 19:02 | | Rushed | 47 - 26 |
| 18:23 | | J. Rachele Behind | 47 - 25 |
| 17:45 | | J. Dawson Behind | 46 - 25 |
| 14:12 | | B. Williams Goal | 45 - 25 |
| 12:03 | | B. Keays Behind | 45 - 19 |
| 10:15 | | J. Rachele Goal | 44 - 19 |
| 6:46 | | A. Treloar Goal | 38 - 19 |
| 6:11 | | S. Darcy Behind | 38 - 13 |
| 4:18 | | D. Fogarty Goal | 38 - 12 |
| 1:58 | | M. Bontempelli Behind | 32 - 12 |
| 0:47 | | S. Darcy Behind | 32 - 11 |
| first Quarter | |||
| Time | Team | Play | Score |
| 24:26 | | Rushed | 32 - 10 |
| 23:04 | | T. Walker Goal | 32 - 9 |
| 21:13 | | R. Thilthorpe Goal | 26 - 9 |
| 18:29 | | L. McNeil Behind | 20 - 9 |
| 15:49 | | D. Fogarty Goal | 20 - 8 |
| 13:54 | | B. Keays Goal | 14 - 8 |
| 11:45 | | A. Naughton Behind | 8 - 8 |
| 10:07 | | T. Walker Behind | 8 - 7 |
| 8:33 | | J. Ugle-Hagan Goal | 7 - 7 |
| 7:02 | | Rushed | 7 - 1 |
| 5:41 | | J. Soligo Behind | 7 - 0 |
| 0:22 | | B. Keays Goal | 6 - 0 |
Who should you be tipping in Round 16 of the AFL season? Our footy experts have put their heads together to help you out. So open your ESPNfootytips app, take notes, and get ahead of the game!
Is St Kilda star Nasiah Wanganeen-Milera keeping tabs on St Kilda's progress, nearly halfway through his two-year deal? Let's get to this week's overreactions column.
The Brownlow Medal is the highest individual honour in the AFL. In 2026, ESPN is giving you an advantage with our one-of-a-kind predictor.
On the ESPN Footy Podcast, Jake Michaels says St Kilda has a battle on its hands to keep Nasiah Wanganeen-Milera at Moorabbin long term.
Join ESPN's footy team for some of the best AFL analysis and insight on the ESPN Footy Podcast.
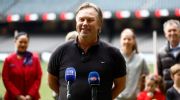
Adelaide great Tony Modra has avoided serious brain injury after a life-threatening truck accident, says fellow club icon Mark Ricciuto.
| POS | Team | Pts. | % | Form |
|---|---|---|---|---|
| 1 |
 FRE FRE
|
52 | 144.4 | WWWWW |
| 2 |
 SYD SYD
|
48 | 143.7 | WLWWW |
| 3 |
 HAW HAW
|
38 | 113.5 | LWWLW |
| 4 |
 GEEL GEEL
|
36 | 120.6 | WLLWL |
| 5 |
 ADEL ADEL
|
36 | 113.2 | WLWWW |
| 6 |
 MELB MELB
|
36 | 104.2 | LLWWL |
| 7 |
 WB WB
|
36 | 92.8 | WWWLW |
| 8 |
 BL BL
|
32 | 108.4 | LLLWW |
| 9 |
 SUNS SUNS
|
28 | 105.3 | WLLLL |
| 10 |
 NMFC NMFC
|
28 | 90.7 | LWLWW |
| 11 |
 COLL COLL
|
26 | 101.5 | LWLLW |
| 12 |
 STK STK
|
24 | 100.6 | LLLWL |
| 13 |
 GWS GWS
|
24 | 100.3 | LWWLL |
| 14 |
 CARL CARL
|
24 | 91.1 | WWWWW |
| 15 |
 PORT PORT
|
16 | 98.7 | LLWLL |
| 16 |
 WCE WCE
|
16 | 72.7 | WLWLL |
| 17 |
 RICH RICH
|
8 | 61.3 | LWLLL |
| 18 |
 ESS ESS
|
4 | 70.4 | LLLLL |