


Game Information
Optus Stadium
| fourth Quarter | |||
|---|---|---|---|
| Time | Team | Play | Score |
| 30:11 |  | P. Voss Behind | 77 - 64 |
| 28:48 | | Rushed | 76 - 64 |
| 21:26 | | J. Treacy Goal | 75 - 64 |
| 15:12 | | S. Darcy Goal | 69 - 64 |
| 12:59 | | S. Darcy Behind | 63 - 64 |
| 7:59 | | P. Voss Goal | 62 - 64 |
| 7:02 |  | Rushed | 56 - 64 |
| 6:15 | | M. Chol Behind | 56 - 63 |
| 2:16 | | S. Switkowski Goal | 56 - 62 |
| 0:28 | | Rushed | 50 - 62 |
| third Quarter | |||
| Time | Team | Play | Score |
| 28:26 | | F. Maginness Goal | 49 - 62 |
| 27:12 | | J. Gunston Behind | 49 - 56 |
| 24:21 | | N. Watson Behind | 49 - 55 |
| 22:03 | | C. Dear Goal | 49 - 54 |
| 22:03 | | C. Macdonald Goal | 49 - 54 |
| 11:29 | | Rushed | 49 - 48 |
| 8:47 | | Rushed | 49 - 47 |
| 4:36 | | M. Frederick Goal | 49 - 46 |
| 1:56 | | S. Switkowski Goal | 43 - 46 |
| second Quarter | |||
| Time | Team | Play | Score |
| 35:57 | | Rushed | 37 - 46 |
| 31:40 | | J. Ginnivan Goal | 37 - 45 |
| 24:16 | | S. Bolton Goal | 37 - 39 |
| 21:26 | | C. Macdonald Goal | 31 - 39 |
| 17:01 | | J. Amiss Goal | 31 - 33 |
| 14:55 | | N. Watson Goal | 25 - 33 |
| 11:16 | | D. Moore Behind | 25 - 27 |
| 6:19 | | C. Dear Goal | 25 - 26 |
| 3:31 | | D. Moore Goal | 25 - 20 |
| 0:56 | | S. Switkowski Goal | 25 - 14 |
| first Quarter | |||
| Time | Team | Play | Score |
| 30:32 | | J. Ginnivan Behind | 19 - 14 |
| 27:14 | | C. Dear Goal | 19 - 13 |
| 24:18 | | S. Bolton Goal | 19 - 7 |
| 21:16 | | M. Frederick Goal | 13 - 7 |
| 11:38 | | J. Gunston Goal | 7 - 7 |
| 9:57 | | L. Meek Behind | 7 - 1 |
| 4:51 | | S. Bolton Behind | 7 - 0 |
| 1:52 | | J. Amiss Goal | 6 - 0 |
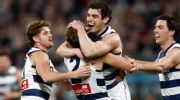
Geelong star Max Holmes was helped off the field with a potentially serious ankle injury in a comprehensive 27-point win over St Kilda.
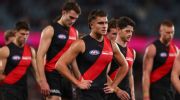
Essendon have become the second club to be hit with a $20,000 fine by the AFL this season after Angus Clarke failed in his bid to overturn a charge of careless contact with an umpire.
On Red Time, Mason Cox recaps his incredible AFL journey and explains what it means to line up for his milestone game in Fremantle colours.
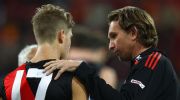
Jake Melksham, the last active AFL player from Essendon's supplements era, has supported James Hird's bid to return as coach of the Bombers.
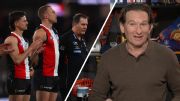
On ESPN Footy Central, James Hird and Dermott Brereton agree the Saints have a great opportunity to win in Geelong for the first time since 1999.
This week's Six Points feature the laughable call for an Essendon assistance package, an analysis of Nick Daicos' coaches votes, why taunting has no place in the game, and a wild Shaun Mannagh stat.
| POS | Team | Pts. | % | Form |
|---|---|---|---|---|
| 1 |
 FRE FRE
|
60 | 142.3 | WWWLW |
| 2 |
 SYD SYD
|
52 | 131.2 | WWLWL |
| 3 |
 HAW HAW
|
46 | 114.2 | LWWLW |
| 4 |
 BL BL
|
44 | 117.1 | WWWWW |
| 5 |
 ADEL ADEL
|
44 | 116.9 | WWLWW |
| 6 |
 MELB MELB
|
44 | 109.0 | WWLWW |
| 7 |
 GEEL GEEL
|
40 | 116.2 | WLLLW |
| 8 |
 WB WB
|
40 | 92.3 | WLWLW |
| 9 |
 COLL COLL
|
38 | 104.4 | LWWWW |
| 10 |
 STK STK
|
32 | 104.0 | WLWWL |
| 11 |
 GWS GWS
|
32 | 101.6 | LLLWW |
| 12 |
 CARL CARL
|
32 | 91.9 | WWWWL |
| 13 |
 NMFC NMFC
|
32 | 91.4 | WWWLL |
| 14 |
 SUNS SUNS
|
28 | 95.6 | LLLLL |
| 15 |
 PORT PORT
|
24 | 101.3 | LLWWL |
| 16 |
 WCE WCE
|
16 | 72.0 | LLLLL |
| 17 |
 RICH RICH
|
8 | 63.0 | LLLLL |
| 18 |
 ESS ESS
|
4 | 66.6 | LLLLL |