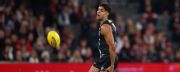



Game Information
Marvel Stadium
| fourth Quarter | |||
|---|---|---|---|
| Time | Team | Play | Score |
| 27:14 |  | Rushed | 69 - 108 |
| 26:34 |  | Rushed | 68 - 108 |
| 25:22 | | B. Kemp Goal | 68 - 107 |
| 23:54 | | M. Owens Goal | 62 - 107 |
| 16:13 | | F. Evans Behind | 62 - 101 |
| 13:33 | | N. Wanganeen-Milera Goal | 61 - 101 |
| 9:27 | | L. Henry Goal | 61 - 95 |
| 3:00 | | H. McKay Behind | 61 - 89 |
| 1:16 | | B. Kemp Behind | 60 - 89 |
| third Quarter | |||
| Time | Team | Play | Score |
| 32:12 | | C. Sharman Behind | 59 - 89 |
| 30:14 | | B. Ainsworth Goal | 59 - 88 |
| 29:05 | | M. Wood Behind | 53 - 88 |
| 26:56 | | T. De Koning Goal | 53 - 87 |
| 24:46 | | R. Marshall Goal | 53 - 81 |
| 22:58 | | M. Wood Goal | 53 - 75 |
| 20:41 | | L. Henry Goal | 53 - 69 |
| 19:40 | | L. Henry Goal | 53 - 63 |
| 15:24 | | M. Owens Goal | 53 - 57 |
| 14:25 | | W. Hayward Behind | 53 - 51 |
| 13:05 | | M. Phillipou Behind | 52 - 51 |
| 11:36 | | M. Owens Behind | 52 - 50 |
| 9:56 | | C. Sharman Goal | 52 - 49 |
| 7:22 | | B. Hill Goal | 52 - 43 |
| 4:19 | | Rushed | 52 - 37 |
| 1:44 | | M. McGovern Behind | 51 - 37 |
| 0:15 | | M. McGovern Behind | 50 - 37 |
| second Quarter | |||
| Time | Team | Play | Score |
| 29:55 | | Z. Williams Behind | 49 - 37 |
| 28:28 | | C. Sharman Behind | 48 - 37 |
| 26:20 | | Rushed | 48 - 36 |
| 24:32 | | R. Marshall Goal | 48 - 35 |
| 22:42 | | B. Ainsworth Goal | 48 - 29 |
| 19:46 | | B. Ainsworth Behind | 42 - 29 |
| 15:05 | | M. McGovern Goal | 41 - 29 |
| 13:55 | | B. Kemp Behind | 35 - 29 |
| 12:05 | | M. Owens Goal | 34 - 29 |
| 9:46 | | M. Carroll Goal | 34 - 23 |
| 7:45 | | P. Cripps Goal | 28 - 23 |
| 4:50 | | B. Kemp Goal | 22 - 23 |
| 3:32 | | A. Caminiti Behind | 16 - 23 |
| 0:48 | | C. Sharman Behind | 16 - 22 |
| first Quarter | |||
| Time | Team | Play | Score |
| 25:08 | | T. De Koning Goal | 16 - 21 |
| 20:52 | | F. Evans Goal | 16 - 15 |
| 19:10 | | R. Marshall Goal | 10 - 15 |
| 17:05 | | N. Wanganeen-Milera Behind | 10 - 9 |
| 16:02 | | H. Garcia Behind | 10 - 8 |
| 15:03 | | B. Kemp Behind | 10 - 7 |
| 14:02 | | J. Smith Behind | 9 - 7 |
| 10:19 | | F. Evans Behind | 8 - 7 |
| 7:57 | | H. McKay Behind | 7 - 7 |
| 6:15 | | B. Kemp Goal | 6 - 7 |
| 2:55 | | M. Owens Behind | 0 - 7 |
| 1:26 | | C. Sharman Goal | 0 - 6 |
Carlton caretaker Josh Fraser wants the fulltime coaching job.
The AFL has hired independent legal counsel to help decide the sanction for Geelong's handling of the club's secret concussion deal.
Round 23 of the 2026 AFL season kicks off with a huge Friday night battle between ladder-leaders Fremantle and the Adelaide Crows.
Who should you be tipping in Round 23 of the AFL season? Our footy experts have put their heads together to help you out. So open your ESPNfootytips app, take notes, and get ahead of the game!
The Saints' finals fate is now out of their hands after their costly and deflating loss to Carlton on Sunday night. Should their season be judged a fail if they don't feature in September? Let's get to this week's big talking point.
Nasiah Wanganeen-Milera's AFL season is over with St Kilda confirming their superstar suffered a moderate grade hamstring injury against Carlton.
| POS | Team | Pts. | % | Form |
|---|---|---|---|---|
| 1 |
 FRE FRE
|
72 | 143.4 | WWWWL |
| 2 |
 SYD SYD
|
64 | 134.0 | LLWWW |
| 3 |
 HAW HAW
|
58 | 118.2 | WWWWL |
| 4 |
 BL BL
|
56 | 117.8 | WWWLW |
| 5 |
 ADEL ADEL
|
56 | 117.6 | WWLWW |
| 6 |
 MELB MELB
|
56 | 107.6 | WWLWW |
| 7 |
 GEEL GEEL
|
52 | 120.6 | LWWWW |
| 8 |
 COLL COLL
|
50 | 106.4 | WWWLW |
| 9 |
 WB WB
|
48 | 93.9 | WWWLL |
| 10 |
 CARL CARL
|
44 | 99.6 | LLWWW |
| 11 |
 STK STK
|
36 | 101.6 | WLWLL |
| 12 |
 GWS GWS
|
36 | 98.9 | WLLWL |
| 13 |
 NMFC NMFC
|
36 | 90.9 | LLLLW |
| 14 |
 SUNS SUNS
|
32 | 95.0 | LLLLW |
| 15 |
 PORT PORT
|
24 | 90.2 | LLLLL |
| 16 |
 WCE WCE
|
16 | 71.5 | LLLLL |
| 17 |
 RICH RICH
|
12 | 63.5 | LLLWL |
| 18 |
 ESS ESS
|
8 | 63.2 | LWLLL |