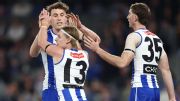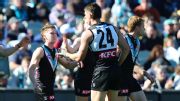



Game Information
Marvel Stadium
| fourth Quarter | |||
|---|---|---|---|
| Time | Team | Play | Score |
| 32:34 |  | A. Caminiti Goal | 94 - 33 |
| 31:19 |  | Q. Narkle Goal | 88 - 33 |
| 25:55 | | M. Owens Goal | 88 - 27 |
| 24:20 | | H. Garcia Goal | 82 - 27 |
| 22:04 | | J. Steele Goal | 76 - 27 |
| 20:29 | | R. Marshall Behind | 70 - 27 |
| 19:16 | | A. Caminiti Behind | 69 - 27 |
| 17:59 | | J. Amiss Goal | 68 - 27 |
| 14:37 | | M. Hall Behind | 68 - 21 |
| 12:08 | | C. Sharman Behind | 67 - 21 |
| 9:41 | | C. Sharman Goal | 66 - 21 |
| 3:50 | | J. Amiss Goal | 60 - 21 |
| 1:33 | | M. Owens Goal | 60 - 15 |
| third Quarter | |||
| Time | Team | Play | Score |
| 29:01 | | C. Sharman Behind | 54 - 15 |
| 25:56 | | C. Sharman Goal | 53 - 15 |
| 24:51 | | I. Dudley Behind | 47 - 15 |
| 22:54 | | R. Marshall Behind | 47 - 14 |
| 20:05 | | L. Collard Goal | 46 - 14 |
| 18:40 | | M. Reid Behind | 40 - 14 |
| 16:34 | | M. Windhager Behind | 40 - 13 |
| 11:29 | | C. Sharman Goal | 39 - 13 |
| 9:30 | | I. Dudley Goal | 33 - 13 |
| 6:28 | | C. Sharman Goal | 33 - 7 |
| second Quarter | |||
| Time | Team | Play | Score |
| 12:55 | | M. Frederick Behind | 27 - 7 |
| 4:45 | | D. Wilson Goal | 27 - 6 |
| 2:03 | | M. Owens Goal | 21 - 6 |
| 0:43 | | Rushed | 15 - 6 |
| first Quarter | |||
| Time | Team | Play | Score |
| 23:04 | | J. Higgins Goal | 14 - 6 |
| 14:44 | | L. Collard Behind | 8 - 6 |
| 7:12 | | H. Young Goal | 7 - 6 |
| 6:09 | | D. Wilson Behind | 7 - 0 |
| 1:22 | | B. Hill Goal | 6 - 0 |
Matthew Jefferson uses his body brilliantly to take a strong contested mark before converting from the goal line.
The Canberra Raiders get their eighth win of 2026 after a strong first half proves enough to hold off a late Rabbitohs surge.
A Melbourne error hands Charlie Spargo his second goal for the quarter in his first game against his old side
Port youngster Joe Berry finds some space after a slick move before kicking a nice goal against the Dockers.
Zac Taylor's run-down tackle gives Luke Nankervis the opportunity to extend Adelaide's lead late in the final term in the win over Sydney.
Chad Warner takes flights on the SCG for an impressive mark against the Adelaide Crows
| POS | Team | Pts. | % | Form |
|---|---|---|---|---|
| 1 |
 FRE FRE
|
64 | 142.0 | WWLWW |
| 2 |
 SYD SYD
|
52 | 128.3 | WLWLL |
| 3 |
 BL BL
|
48 | 117.8 | WWWWW |
| 4 |
 ADEL ADEL
|
48 | 117.2 | WLWWW |
| 5 |
 MELB MELB
|
48 | 109.6 | WLWWW |
| 6 |
 HAW HAW
|
46 | 114.2 | LWWLW |
| 7 |
 COLL COLL
|
42 | 105.6 | WWWWW |
| 8 |
 GEEL GEEL
|
40 | 116.2 | WLLLW |
| 9 |
 WB WB
|
40 | 92.3 | WLWLW |
| 10 |
 STK STK
|
32 | 104.0 | WLWWL |
| 11 |
 GWS GWS
|
32 | 101.6 | LLLWW |
| 12 |
 CARL CARL
|
32 | 91.1 | WWWLL |
| 13 |
 NMFC NMFC
|
32 | 90.9 | WWLLL |
| 14 |
 SUNS SUNS
|
28 | 95.6 | LLLLL |
| 15 |
 PORT PORT
|
24 | 99.3 | LWWLL |
| 16 |
 WCE WCE
|
16 | 72.1 | LLLLL |
| 17 |
 RICH RICH
|
8 | 63.0 | LLLLL |
| 18 |
 ESS ESS
|
4 | 66.6 | LLLLL |