


Game Information
Marvel Stadium
| fourth Quarter | |||
|---|---|---|---|
| Time | Team | Play | Score |
| 31:18 |  | Rushed | 104 - 85 |
| 30:07 |  | J. Billings Behind | 104 - 84 |
| 25:44 | | J. Billings Goal | 103 - 84 |
| 23:40 | | N. Hind Goal | 97 - 84 |
| 22:12 | | J. Lonie Behind | 91 - 84 |
| 20:46 | | N. Hind Behind | 90 - 84 |
| 17:22 | | B. Long Goal | 89 - 84 |
| 13:51 | | A. Neal-Bullen Goal | 83 - 84 |
| 13:10 | | Rushed | 83 - 78 |
| 11:23 | | J. Bruce Goal | 82 - 78 |
| 7:51 | | J. Lonie Goal | 76 - 78 |
| 2:16 | | J. Harmes Goal | 70 - 78 |
| 0:21 | | C. Oliver Goal | 70 - 72 |
| third Quarter | |||
| Time | Team | Play | Score |
| 30:25 | | J. Bruce Goal | 70 - 66 |
| 26:58 | | H. Petty Goal | 64 - 66 |
| 25:54 | | C. Petracca Goal | 64 - 60 |
| 23:47 | | J. Lonie Behind | 64 - 54 |
| 22:23 | | S. Ross Goal | 63 - 54 |
| 21:40 | | Rushed | 57 - 54 |
| 18:39 | | J. Harmes Goal | 56 - 54 |
| 16:43 | | J. Lonie Behind | 56 - 48 |
| 13:35 | | T. Membrey Goal | 55 - 48 |
| 12:00 | | T. Membrey Goal | 49 - 48 |
| 8:55 | | A. Brayshaw Behind | 43 - 48 |
| 8:30 | | O. Baker Behind | 43 - 47 |
| 7:24 | | C. Petracca Goal | 43 - 46 |
| 5:37 | | T. Membrey Goal | 43 - 40 |
| second Quarter | |||
| Time | Team | Play | Score |
| 26:17 | | H. Clark Behind | 37 - 40 |
| 24:16 | | J. Gresham Behind | 36 - 40 |
| 22:56 | | D. Langlands Goal | 35 - 40 |
| 20:58 | | B. Long Behind | 29 - 40 |
| 19:31 | | T. Membrey Behind | 28 - 40 |
| 17:30 | | J. Bruce Goal | 27 - 40 |
| 15:22 | | C. Wagner Goal | 21 - 40 |
| 11:53 | | J. Billings Behind | 21 - 34 |
| 1:57 | | Rushed | 20 - 34 |
| first Quarter | |||
| Time | Team | Play | Score |
| 33:34 | | T. Smith Goal | 20 - 33 |
| 30:09 | | B. Fritsch Goal | 20 - 27 |
| 29:24 | | M. Hibberd Behind | 20 - 21 |
| 26:50 | | Rushed | 20 - 20 |
| 24:20 | | J. Wagner Behind | 19 - 20 |
| 23:38 | | Rushed | 19 - 19 |
| 20:27 | | B. Long Goal | 19 - 18 |
| 16:31 | | J. Bruce Goal | 13 - 18 |
| 11:04 | | S. Ross Goal | 7 - 18 |
| 8:53 | | L. Dunstan Behind | 1 - 18 |
| 5:21 | | C. Petracca Goal | 0 - 18 |
| 3:27 | | J. Lewis Goal | 0 - 12 |
| 1:02 | | B. Fritsch Goal | 0 - 6 |
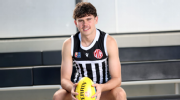
Missing significant chunks of football hasn't stopped Port Adelaide NGA star Dougie Cochrane from firming as the top prospect in this year's AFL Draft.
Who are the 2027 flag favourites? Who are the legitimate contenders? And who should already be booking September holidays? It's our way-too-early edition of AFL tiers.
The AFL offseason is a time for hope. Here's the latest 2026 AFL national draft indicative order, taking into account completed pick swaps and trades.
The 2026 AFL trade and free agency period is over. Some teams improved, some stagnated, and others, well, got worse. Here's how every team fared over the last two weeks.
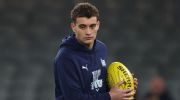
Cody Walker has lived a year of Carlton's ups and downs before having even been drafted. He's learned a lot about the business of footy and what he needs to do to take the next step, as his own AFL career begins.
The AFL trade period is over and attention turns to the draft. So who goes where? When will bids land? Here's Jasper Chellappah's early, first-round Phantom Draft.
| POS | Team | Pts. | % | Form |
|---|---|---|---|---|
| 1 |
 FRE |
76 | 137.2 | WWLWL |
| 2 |
 SYD |
72 | 136.1 | WWWWW |
| 3 |
 BL |
64 | 121.7 | WLWWW |
| 4 |
 HAW |
64 | 120.1 | WWLDW |
| 5 |
 GEEL |
60 | 122.3 | WWWWW |
| 6 |
 ADEL |
60 | 117.3 | LWWLW |
| 7 |
 MELB |
60 | 109.6 | LWWWL |
| 8 |
 WB |
54 | 95.4 | WLLDW |
| 9 |
 COLL |
52 | 102.4 | WLWDL |
| 10 |
 CARL |
50 | 101.5 | WWWDW |
| 11 |
 STK |
40 | 102.8 | WLLWL |
| 12 |
 GWS |
40 | 98.9 | LWLWL |
| 13 |
 SUNS |
36 | 94.5 | LLWLW |
| 14 |
 NMFC |
36 | 88.8 | LLWLL |
| 15 |
 PORT |
28 | 88.1 | LLLLW |
| 16 |
 WCE |
16 | 69.2 | LLLLL |
| 17 |
 RICH |
12 | 62.5 | LWLLL |
| 18 |
 ESS |
8 | 64.6 | LLLLL |